
Israeli pita bread recipe; much more than bread
If you’ve ever tasted a good Israeli pita bread recipe, you know it’s more than bread. It’s an experience, a daily ritual and a delicacy passed down from generation to generation.
Check any freezer in Israel, and you’re sure to find pita bread (we keep it in the freezer so it stays fresh longer). Pita bread is a classic. We dip it in hummus.
We also stuff it with falafel, meat or sabich. We use it to make sandwiches for our kids’ lunches. The sandwiches can have eggs, cheese, tuna, veggies or whatever they prefer.
This soft flat bread is part of our traditional cuisine. It is a food that links us to our roots. Our grandmothers served it warm, wrapped in a clean cloth, along with homemade hummus.
Freshly baked pita is one of the key components of the traditional Israeli breakfast , where it is often served with salads, eggs and spreads.
A pita bread with history (and a lot of flavor)
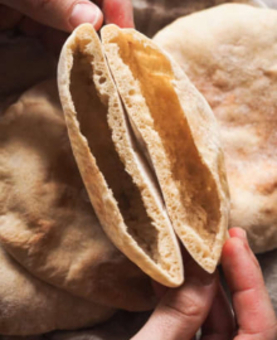
The history of pita bread begins much earlier than we imagine: around 4000 B.C. in Egypt. While many Middle Eastern flatbreads, such as Persian lavash, don’t have pockets, Israeli pita bread does.
And that makes it unique! That famous little pocket inside is like a small cooking miracle. You can fill it with whatever you want.
According to Asif, a culinary center in Tel Aviv, vendors sold a bread called kmaj in 17th century Jerusalem. This name comes from the Turkish kūmāj. Over time, this bread evolved and became what we know today as pita bread.
Why is Israeli pita bread ideal for falafel?

When I think of pita bread, I think of hummus. I like to go to one of the most famous hummus in Israel. There are so many good ones that I don’t know which one to choose.
I love dipping fresh pita bread into a big bowl of warm hummus. It’s incredibly delicious and satiating at any time of the day (I love it for breakfast, but it also works for lunch or dinner!).
This bread is a treasure in Israeli cooking. It is versatile and has a thick, fluffy texture.
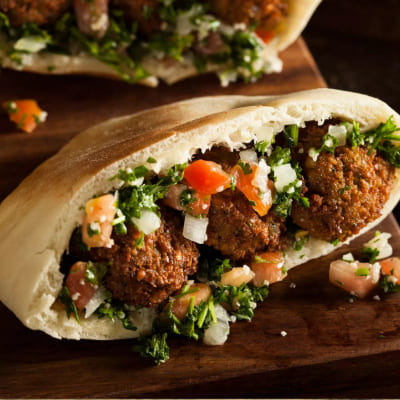
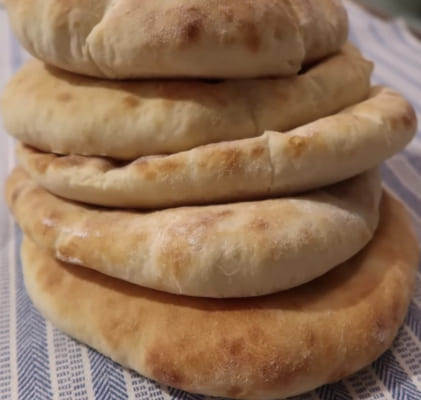
Have you ever had falafel in a pita that didn’t break? That’s because authentic Israeli pitas can handle anything! They are usually up to 1.25 cm thick and are soft on the inside but tough on the outside.
The Yemenite legacy behind the flavor
Did you know that Yemenite Jews played a crucial role in the popularity of Israeli pita bread? They started selling falafel in Jewish communities in the 1950s. They used their own thick flatbread, called salouf, as the base for their sandwiches. That was the origin of the thick pita that is so popular in Israel today.
This type of pita is hard to find in other countries, especially in the United States. Some brands, like Angel Bakery, do export it.
So, if you don’t have access to a good Israeli bakery nearby, I have good news for you…
How to make an authentic Israeli pita bread recipe at home?
Pita bread is the most common bread in our region. You can find it in any bakery and supermarket. However, nowadays, it is more popular in other parts of the world. If you don’t have access to a good pita bread nearby, I have good news: it’s easy to make at home.
Ever since I discovered this recipe, I love making my own pitas in the comfort of my own home. While I can easily go to the local bakery to buy fresh pitas, making them at home is fun and enjoyable. Most of all, it connects me to my roots and the authentic taste of my childhood.
Plus, making them helps keep the tradition alive. Isn’t it nice to think you are kneading something that many generations before you also made with love?
If you want to accompany it like a true Israeli, don’t forget a glass of strong and aromatic Israeli black coffee.
Israeli style on your table
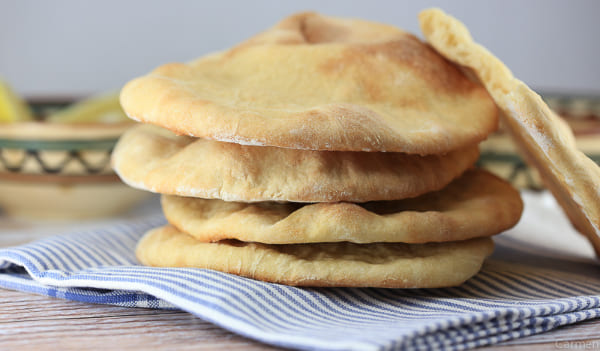
Israeli-style pita bread is different: it’s thick, fluffy, chewy and with personality. It’s not just bread.
It’s the holder of your memories. It hugs your favorite hummus. It shines on every Israeli table.
What if you videotaped yourself making it? You could upload it to YouTube and share with others your homemade version of this delicacy. Nothing like showing how to make something so authentic with your own hands.
A tradition that freezes and shares
Once you make your first batch, you’ll notice how well it freezes. Save some for later and you’ll have pita bread ready for any occasion. Whether it’s for an impromptu dinner or to revive that special weekend breakfast, your freezer will be your best ally.
And if you pair it with homemade hummus, pickles, or Israeli salad, then you’re not just cooking…you’re telling a story.
Israeli Pita Bread Recipe
Equipment
- 1 Stand mixer
- 1 Spoon
- 1 Clean kitchen towel
- 1 Rolling Pin
- 1 Baking tray
- 1 Baking gloves
- 1 Conventional oven
Ingredients
- 1 kg White flour
- 1.5 tbsp Dry yeast
- 1 tbsp Kosher salt
- 2 tbsp Brown sugar
- 3 cups Water (can be warm)
Instructions
- Sift the flour into the bowl of a stand mixer and add the yeast, then mix to combine.
- Attach the dough hook to the mixer and set it to a low speed.
- Gradually add the sugar, olive oil, salt, and finally the water, mixing slowly until the dough pulls away from the sides of the bowl.
- Let the dough rest for 10 minutes. Place the dough in a bowl that has been lightly greased with oil. Cover it and leave it in a warm spot for 60–90 minutes, or until it has expanded to twice its original size.
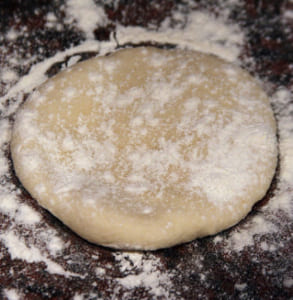
- Deflate the dough by pressing down on it to remove any trapped air. Then, cut it into 15 equal pieces and form each piece into a round ball.
- Arrange the dough balls on a floured work surface or a large tray. Drape a towel over them and allow them to rest for 15 minutes for a second rise.
- Preheat the oven to 480°F (250°C) and place a baking sheet upside down in the oven. This will act as a baking stone, reaching high temperatures to help the pitas rise properly.
- Cover a baking sheet with parchment paper, then arrange the flattened dough balls on top.
- Remove the hot baking sheet from the oven (be careful!)
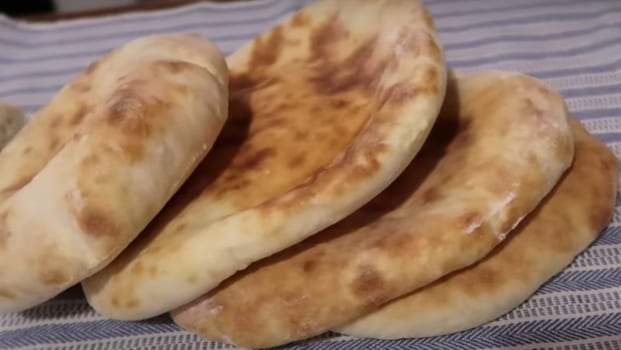
- Bake the pitas for 3–4 minutes until they puff up. Then, turn them over and bake for an additional 1–2 minutes. Keep in mind that baking times can vary depending on your oven, so keep a close eye on them!
- Allow the pitas to cool under a towel to prevent them from drying out, ensuring they remain covered at all times.
- These pitas are best on the day they are baked (you probably won’t have any leftover anyway, since they are so good!). Enjoy!